This is a custom card for Home Assistant to show the NYC subway feed. It is powered by data from with ha-gtfs-rt. There are several forks of that integration; it's likely they will all work with this card but you may have to modify the YAML config slightly.
- Copy the raw code in /dist/index.js
- Create a file in the
/config/www/. Call itmta-card.js. - Paste the code in this new file and save it.
Follow the instructions to install ha-gtfs-rt on your Home Assistant. Do not configure any sensors yet, use these instructions below.
Visit MTA Developers to get an API key. Request a key from this link. The Bus Time API also works for subways.
Open the configuration.yaml file in the config/ directory.
Under sensor, add the following template
sensor:
  - platform: gtfs_rt
    trip_update_url: <api-endpoint-found-in-next-step>
x_api_key: <your-mta-api-key>For each train you want to see, copy the feed's API endpoints and add to the template. For example, if you want to track the A, C, and L trains, you'll need the following. Note that the A and C trains share the same trip_update_url, so we only need two objects in the sensor array to track our three trains.
sensor:
  - platform: gtfs_rt
    trip_update_url: https://api-endpoint.mta.info/Dataservice/mtagtfsfeeds/nyct%2Fgtfs-ace
    x_api_key: <your-mta-api-key>
  - platform: gtfs_rt
    trip_update_url: https://api-endpoint.mta.info/Dataservice/mtagtfsfeeds/nyct%2Fgtfs-l
x_api_key: <your-mta-api-key>Add a departures array to each sensor. The example below will add sensors for A and C trains going north and south and the L train going south (or east towards Brooklyn).
| Field | Description |
|---|---|
| name | The name of sensor in Home Assistant. Choose a value that is intuitive to you. Examples: "A North" or "A Northbound 14th St" |
| route | This controls the icon of the train in the feed. Choose a value that matches the list of SVG files. This is case insensitive. For example, if you set this value as "A", the card will use a.svg for the icon. |
| stopid | This is the stop ID you want to track arrival train times for. More instructions on how to find this below. |
sensor:
  - platform: gtfs_rt
    trip_update_url: https://api-endpoint.mta.info/Dataservice/mtagtfsfeeds/nyct%2Fgtfs-ace
    x_api_key: <your-mta-api-key>
    departures:
      - name: "A North"
        route: "A"
        stopid: "A31N"
      - name: "A South"
        route: "A"
        stopid: "A31S"
      - name: "C North"
        route: "C"
        stopid: "A31N"
      - name: "C South"
        route: "C"
        stopid: "A31S"
  - platform: gtfs_rt
    trip_update_url: https://api-endpoint.mta.info/Dataservice/mtagtfsfeeds/nyct%2Fgtfs-l
    x_api_key: <your-mta-api-key>
    departures:
      - name: "L East"
        route: "L"
stopid: "L01S"Use Transit Feeds to find all stop IDs for a given train. Note that stop IDs are shared between subway lines. For example, Northbound A and C trains at 14th St have an ID of A31N.
Sometimes this is not obvious. The A24S stop has A, B, C, and D trains, but the naming only references the A train.
The first character refers to the train. The middle two characters are the stop number. The last character is the direction.
The map only shows southbound trains but just flip the last character from S to N for the northbound trains at the same station.
There are stop IDs that show both directions of trains. For example, this would be A28 without a fourth character. Do not use these stop IDs for sensors; they will not work correctly with this custom card.
Add a card to your dashboard. In the Search cards bar, type "MTA Card." Use the following configuration:
| Field | Description |
|---|---|
| title | The text at the top of the card |
| sensor name | The sensor name will depend on the name specified in configuration.yaml |
| sensor minutes | How many minutes it takes you to walk to the subway. This hides any subway times that will depart before you get to the station. Exclude this field if you don't want to filter out any trains. |
| sensor label | The text describing the train. This can be useful if you have a unified feed for both northbound and southbound trains. |
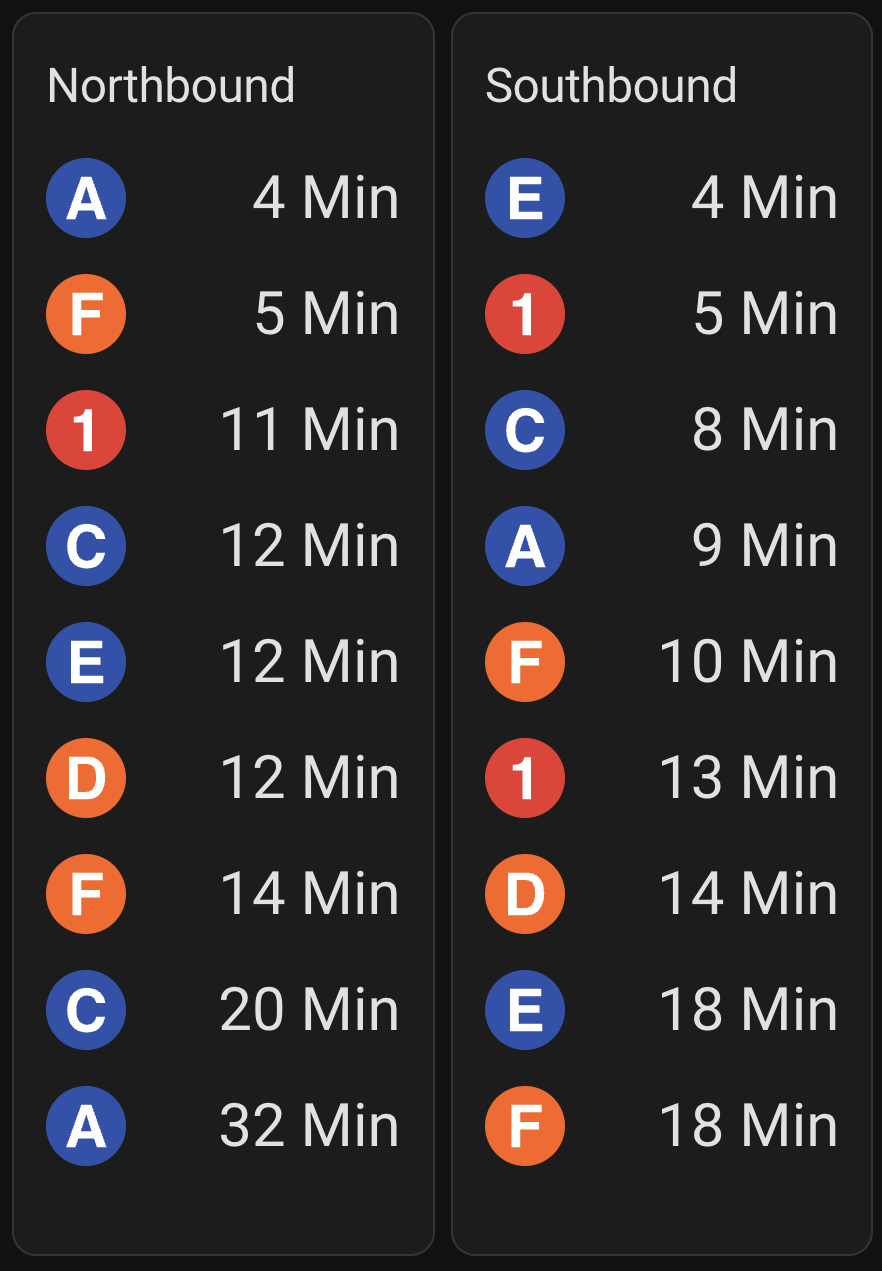
type: custom:mta-card
title: Southbound Trains and L
sensors:
- name: sensor.a_south
minutes: 3
- name: sensor.c_south
minutes: 3
- name: sensor.l_east
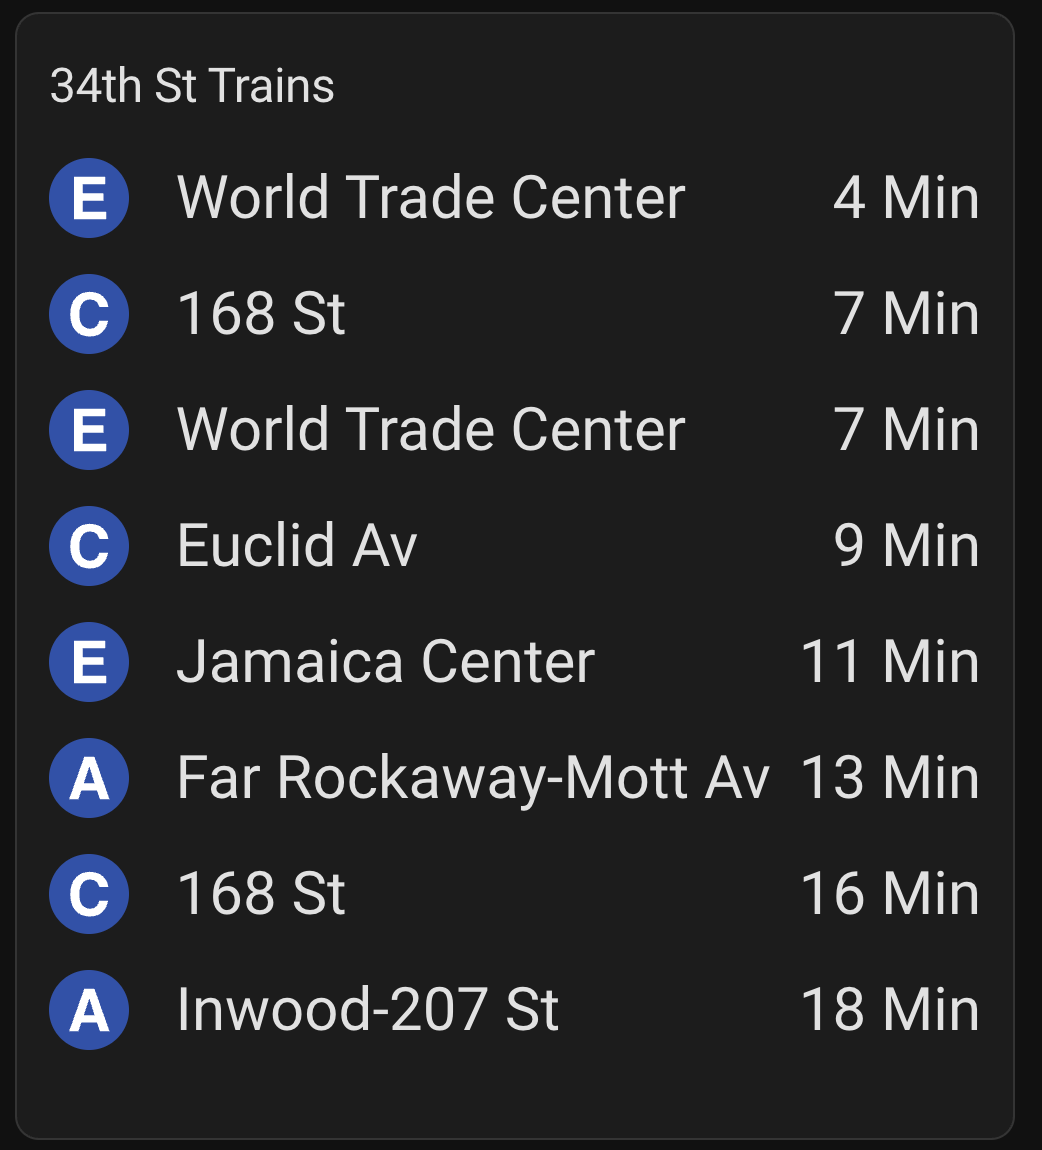
minutes: 4 # giving myself an extra minute to walk down the stairs to the L platform Example with a unified direction feed
type: custom:mta-card
title: Southbound Trains and L
sensors:
  - name: sensor.a_south
    minutes: 4
    label: Far Rockaway-Mott Av
  - name: sensor.a_north
    minutes: 4
    label: Inwood-207 St
  - name: sensor.c_south
    minutes: 3
    label: Euclid Av
  - name: sensor.c_north
    minutes: 3
    label: 168 St
  - name: sensor.e_south
    minutes: 3
    label: World Trade Center
  - name: sensor.e_north
    minutes: 3
label: Jamaica CenterThese are the recommended layout options. The width of the cards (columns) will take up the minimum width if omitted. full will expand the card up to the max width, this option is best if you are adding a label for each sensor.
grid_options:
  rows: auto
  # columns: full